Free delivery on orders over £35
|
Beautiful Nails, Beautiful Savings
|
Fresh nail designs every week!
|
|
Free delivery on orders over £35
|
Beautiful Nails, Beautiful Savings
|
Fresh nail designs every week!
|
|
Choose what you are happy for us to use. Essential cookies keep the shop working, so they stay on.
Needed to run the shop: your basket, secure checkout, your login, fraud prevention and remembering this cookie choice. These cannot be switched off.
Remembers how you like the site to look and behave — recently viewed shades, your wishlist and display settings. Nothing here is based on your interests or used for advertising.
On by default for this purpose. Switch it off and we will stop.
Helps us count visits and see which pages and products people struggle with, so we can improve the shop. We use Google Analytics for this.
Lets us show you our ads on Google, Meta and other sites, and measure whether those ads led to an order. This involves sharing data with those companies.
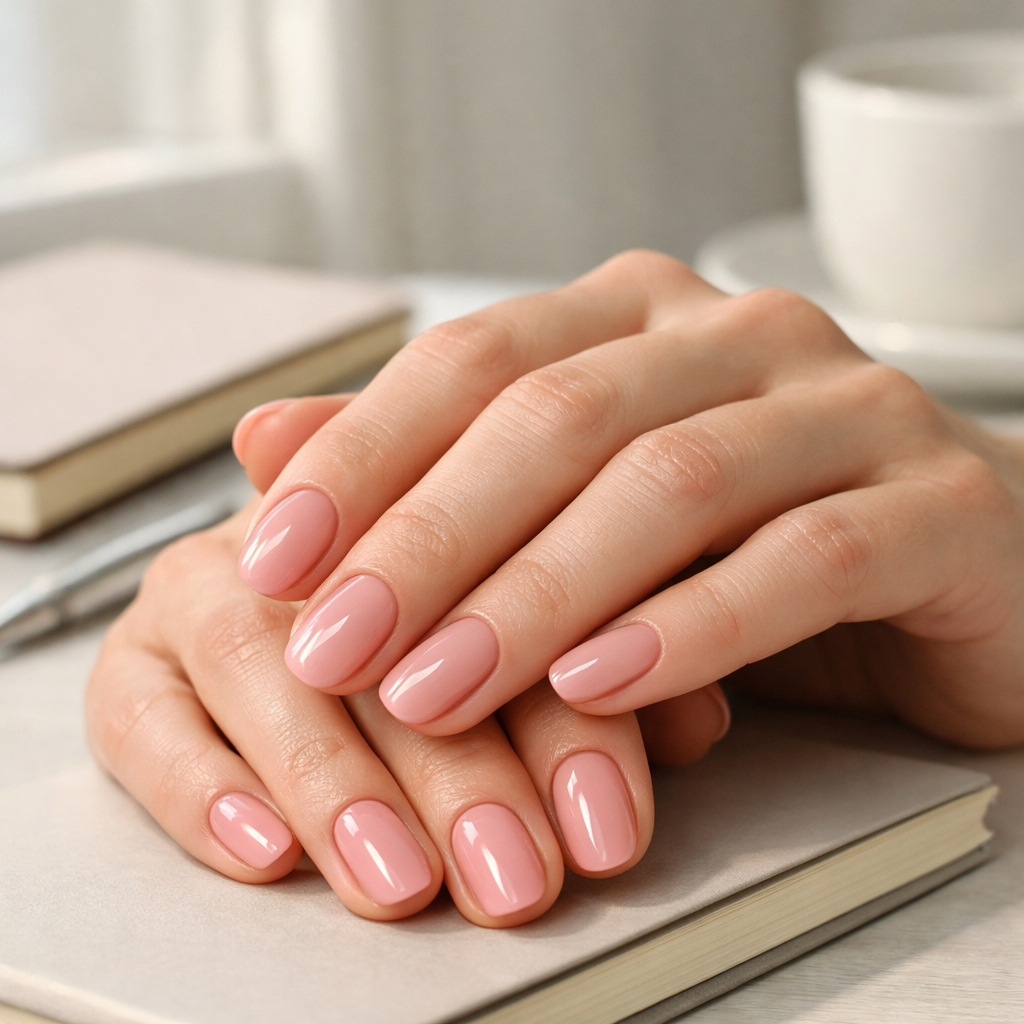
The 1.1mm rule is Velvora’s simple fit trick for getting cleaner, longer-lasting semi-cured gel nail strips at home. In plain terms, it means leaving a tiny visible gap, roughly 1.1mm, between your strip and the skin around your cuticle, so the gel bonds to nail only, not skin.
A semi-cured gel nail strip is a flexible layer of real gel polish that is partially cured, shaped to the nail, then fully hardened under a UV LED lamp. If you are new, start with the getting started guide for at-home gel nails, then use this 1.1mm rule as your finishing detail. Ready to practise on your next set? Browse Velvora’s semi-cured gel nail strips and pick a shade you will happily stare at for two weeks.
The 1.1mm rule means placing each gel nail strip close to the cuticle, but not touching the cuticle or sidewall skin. That tiny space helps stop lifting, snagging and water getting under the gel.
Most first-time lifting happens at the back edge of the nail. In our experience, the strip often looks fine on day one, then catches on hair or fabric by day two because a microscopic corner was sitting on skin. Skin naturally sheds and moves, while nail plate is stable enough for the adhesive gel to grip.
Think of 1.1mm as a neat breathing space, not a visible gap from across the room. On shorter nails, it is about the width of a fine pencil line. On longer nails, it simply keeps the gel away from the soft tissue without making the manicure look grown out.
Pushing a strip right into the cuticle can look tempting because it gives a fresh salon-style finish at first glance. The issue is that gel on skin cannot bond properly, and once it lifts, water, oils and everyday friction can travel under the strip.
A better result comes from matching the strip to the nail plate, smoothing from the centre outward, then sealing the edge with firm pressure. We recommend pressing each strip for 30 seconds before curing, not 10. That extra time makes a noticeable difference around the curved cuticle area.
To use the 1.1mm rule, prep the nail, size the strip slightly narrower than your nail plate, place it just away from the cuticle, press for 30 seconds, trim, then cure fully under a UV LED lamp.
Here is the routine we use when testing new designs across different nail shapes. It is quick, but it is not rushed.
If you want the easiest route, the Velvora Gel Nail Strips Starter Kit includes the essentials for a first at-home gel manicure. For curing support, Velvora’s UV LED lamp accessories are designed for semi-cured gel strips rather than traditional wet gel polish.
After testing across hundreds of nail shapes and sizes, we have found that the thumb and index finger usually need the most careful cuticle spacing. These nails do more work during the day, from opening packaging to typing, so any tiny lifted edge shows up there first.
If you only have time to be fussy on two nails, be fussy on those. Press them for the full 30 seconds before curing and run a fingertip around the cuticle edge. It should feel smooth, not raised.
The best gel nail strip placement is close enough to look polished, but far enough from the skin to prevent lifting. Too close causes early peeling, while too wide can make the manicure look grown out before it has even cured.
| Placement style | What it looks like | Likely result | Best fix |
|---|---|---|---|
| Touching cuticle or side skin | Very fresh at first, no visible border | Higher chance of lifting within 24 to 48 hours | Reposition before curing and leave a fine 1.1mm gap |
| About 1.1mm from cuticle | Clean, close and salon neat | Best balance of neat finish and strong wear | Press for 30 seconds, then cure fully |
| Too far from cuticle | Looks grown out on day one | Usually wears well, but less polished | Choose a better curved fit and place closer next time |
| Too wide at sidewalls | Edges touch skin at the sides | Can snag when washing hair or applying skincare | Size down or trim before curing |
The same principle works for solid colours, French tips, glitter and patterned styles. With a French design, check the cuticle end first, then adjust the tip line. The cuticle fit is what keeps the manicure looking smooth as it wears.
Nail prep matters because gel strips adhere best to a clean, dry nail plate with no oil, dust or cuticle film. Even perfect 1.1mm placement can fail if the surface underneath is not ready.
A common customer mistake is applying cuticle oil immediately before gel strips. Cuticle oil is brilliant for aftercare, but it should not sit under the adhesive layer. Use it after curing, or on the days between manicures.
For daily care, a pen-style oil is easier to control around the edges without flooding the nail. The Vanilla Cuticle Oil Pen is a handy choice for applying a small amount along the skin after your manicure has cured.
Avoid soaking nails just before application, as water can temporarily swell the nail plate. When the nail dries and contracts, the strip may lose tension at the edge. Also avoid heavy hand creams, balm cleansers and oily skincare on your fingertips before application.
If your nails are naturally bendy, keep them shorter while you learn. A shorter free edge flexes less, which helps the cured strip stay sealed. For general nail health, the NHS guide to nail problems is a useful reference if you notice pain, infection, colour changes or persistent nail splitting.
The 1.1mm rule works for most natural nail shapes, but the way you create the gap changes slightly for round, square, almond and very small nail beds.
Round and oval nails usually suit the natural curve of semi-cured strips. Square nails may need extra smoothing at the corners, as the sidewalls are often straighter. Almond nails can need careful centring so the tip does not twist when you file.
For very small nails, use the smaller strip even if it leaves a fine side border. It is better to see a narrow line of natural nail than to cure gel onto skin. Each Velvora set includes 20 strips in varied sizes, so you can mix and match for both hands rather than forcing a perfect pair.
Short nails can wear gel strips beautifully, but they need a tidy free-edge finish. If there is not much tip to wrap, file gently downward after trimming and avoid sawing side to side. A rough edge is more likely to catch during hair washing.
In our experience, most first-time users get a salon-quality finish within about 10 minutes once their sizing is sorted. The first set is where you learn your nail map. The second set is usually much faster.
Velvora gel strips are designed for accurate at-home application, with flexible semi-cured gel, multiple sizes per set and a formula that is 100% vegan, cruelty-free, 14-Free and HEMA-Free.
They are also UK and EU compliant, CPNP registered and REACH certified. If you like to check ingredient and compliance details before buying beauty products, read Velvora’s product safety and ingredients information. The strips are made in certified facilities using Japanese blade technology for clean shaping, which helps when you are trying to leave an even cuticle gap.
Velvora gel strips start from GBP 10 per set, with free UK delivery on orders over GBP 35 and UK-based customer support if you need help choosing a design. Regular users can also use bundles or subscription options to keep fresh sets ready without last-minute salon booking stress.
If you are building your first kit, choose a forgiving neutral or soft shimmer while you practise your 1.1mm placement. Deeper shades look gorgeous, but they show uneven cuticle spacing more clearly. Once your technique feels easy, go bold.
The 1.1mm rule means leaving a very small gap of about 1.1mm between the gel nail strip and your cuticle or sidewall skin. This helps the strip bond to the nail plate rather than the skin, reducing early lifting.
Gel nail strips usually lift near the cuticle because the strip is touching skin, sitting over cuticle film, or applied over oil or moisture. Clean prep, accurate sizing and a small cuticle gap usually fix the issue.
No, gel nail strips should not touch the skin. They should sit only on the nail plate, with a tiny border around the cuticle and sidewalls, so they can cure smoothly and wear for up to 2 weeks.
Press each gel nail strip for about 30 seconds before curing, especially around the cuticle and side edges. In our experience, this gives a better seal than a quick 10-second press.
Avoid using cuticle oil immediately before applying gel strips, as oil can weaken adhesion. Use cuticle oil after curing and during aftercare to keep the surrounding skin soft.
Yes, semi-cured gel nail strips need a UV LED lamp to fully harden. The strip is only partially cured in the packet, so lamp curing completes the manicure and improves durability.
The easiest way to improve gel strip wear is to slow down for the first two minutes: size carefully, leave the 1.1mm cuticle gap, press for 30 seconds and cure properly. That small habit can make your manicure look neater and last longer.
Find your perfect shade, build a starter routine and test the fit on your next manicure. You can shop Velvora nails and accessories now with free UK delivery on qualifying orders over GBP 35.

No account yet?
Create an Account
