Free delivery on orders over £35
|
Beautiful Nails, Beautiful Savings
|
Fresh nail designs every week!
|
|
Free delivery on orders over £35
|
Beautiful Nails, Beautiful Savings
|
Fresh nail designs every week!
|
|
Choose what you are happy for us to use. Essential cookies keep the shop working, so they stay on.
Needed to run the shop: your basket, secure checkout, your login, fraud prevention and remembering this cookie choice. These cannot be switched off.
Remembers how you like the site to look and behave — recently viewed shades, your wishlist and display settings. Nothing here is based on your interests or used for advertising.
On by default for this purpose. Switch it off and we will stop.
Helps us count visits and see which pages and products people struggle with, so we can improve the shop. We use Google Analytics for this.
Lets us show you our ads on Google, Meta and other sites, and measure whether those ads led to an order. This involves sharing data with those companies.
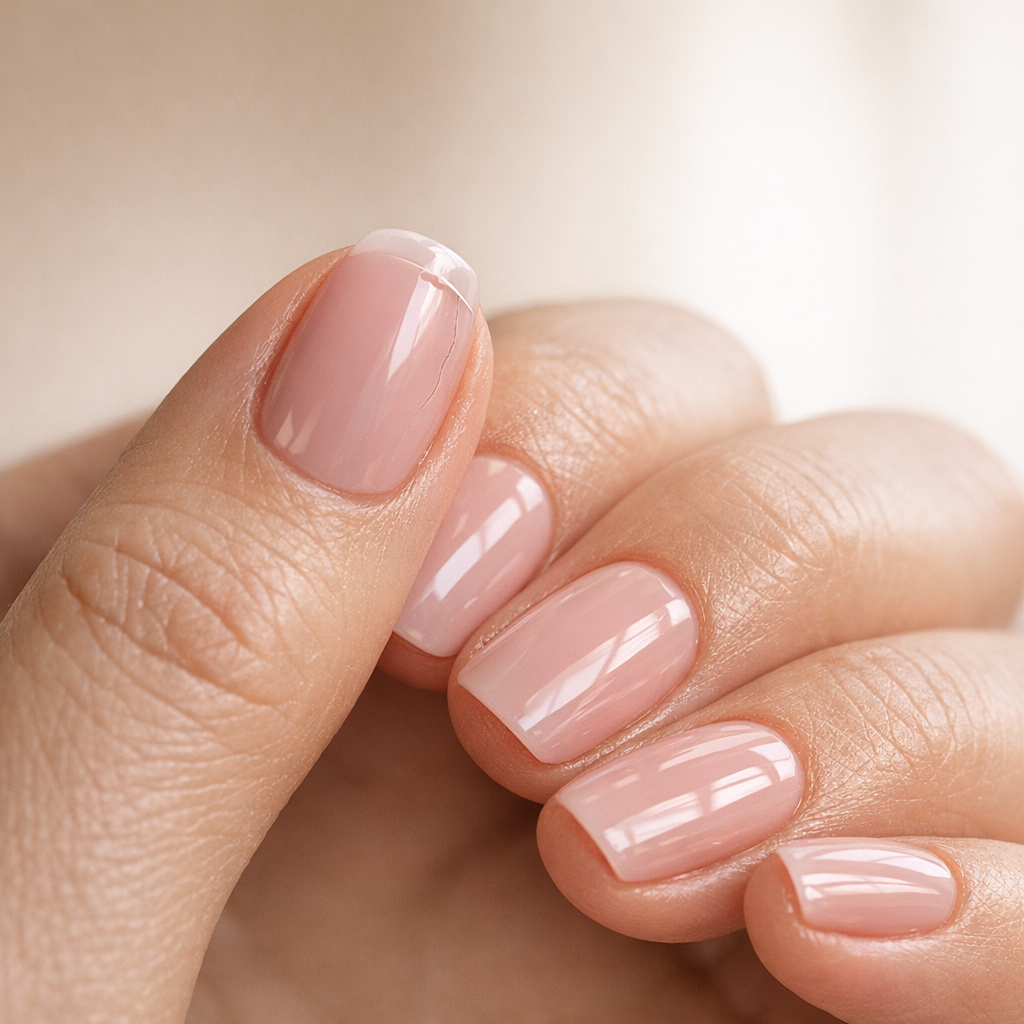
If your nail wraps look perfect on day one and then crack or lift a few days later, you’re not alone. In our experience, it’s rarely “bad strips” — it’s usually a prep, fit, or curing issue that’s easy to fix once you know what to look for.
Before we dive in, if you want the quickest path to a long-lasting set, browse our semi-cured gel nail strips and pick a style that suits your week. Gel strips start from around £10 per set, each set includes 20 strips in multiple sizes, and we offer free UK delivery over £35.
Cracking is usually the end result of lifting: once an edge isn’t fully bonded, water and air get underneath, the strip flexes with everyday use, and tiny stress lines turn into visible cracks.
Semi-cured gel strips are partially polymerised (pre-cured) and then fully hardened with UV/LED. If the strip isn’t sitting flush, or if the gel isn’t cured enough, that “seal” never fully forms. Add hand washing, hot showers, and keyboard time, and the weak point shows up fast.
One thing we hear from customers time and again is that the set looks amazing until they wash their hair or do a big clean. That’s a clue: movement + moisture finds the smallest lifting edge.
If your nail strips not sticking problem is consistent, it’s almost always one (or a combo) of the issues below — and you can usually spot which one applies by where the cracking starts.
The best fix for nail strips not sticking is proper prep: clean, dry nails with a lightly smoothed surface and cuticles pushed back.
If you want a step-by-step walkthrough with timings, our team guide is here: how to apply gel strips.
Cracking often starts at the sides and tip because that’s where stress is highest. A perfect fit prevents micro-lifts that turn into cracks.
After testing across hundreds of nail shapes and sizes, our rule is: go slightly smaller rather than larger. If a strip touches skin at the sidewall, it will lift as soon as you wash your hands — and lifting is the start of cracking.
Place the strip so it sits just shy of the cuticle line (think: the thickness of a hair). Press down firmly at the cuticle edge, then smooth towards the tip.
When you file the excess, file in one direction (not back and forth), and cap the free edge by angling the file under the nail slightly. This “locks” the gel to the tip — crucial if your cracks start right at the edge.
Under-curing is far more likely than over-curing in at-home setups, and it’s a top cause of nail strips not sticking properly.
If you’re still using a random lamp from years ago, upgrading can make a noticeable difference in wear. Our UV LED lamp collection is designed for semi-cured gel strips, so you get a consistent cure.
Even a perfect application can crack early if your nails take repeated impact or prolonged soaking. The goal is to reduce flex and water exposure in the first 24 hours.
Our community of Velvora fans often shares that wearing gloves for washing up alone adds several days of wear. It’s not glamorous, but it’s effective.
| What you’re seeing | Most likely cause | Fix for next time |
|---|---|---|
| Cracks at the sides by day 2–4 | Strip touching skin / size too wide | Choose a slightly smaller size; press sidewalls firmly; avoid stretching |
| Cracks at the tip, looks like chipping | Free edge not sealed / rough filing | Cap the edge; file one direction; add a short extra cure |
| Lifting near the cuticle then cracking | Oils or cuticle skin under strip | Clean with alcohol; push back cuticles; leave a tiny gap |
| Whole strip feels bendy and creases | Under-curing / lamp placement | Reposition hand; cure longer; consider a dedicated UV/LED lamp |
| Random cracks across nails | Nails very flexible/peeling | Prioritise aftercare; avoid harsh removal; oil daily after wear |
You can often save a set if you catch lifting early. Once water gets under a strip repeatedly, it’s usually better to replace that nail.
If a crack runs across the nail, it will keep spreading with movement. In our experience, the cleanest solution is replacing that strip rather than trying to patch it.
Regular wearer? A bundle makes it easy to keep spares on hand. The Mix & Match Trio (3 strips) is a simple way to build a rotation without overthinking it.
If you’re ready for a fresh set, shop now and choose a design that suits your plans this week.
Healthy, hydrated nails help strips last longer because they flex less and peel less. The trick is to oil after application — not before.
Once your strips are fully cured, apply cuticle oil daily. It keeps the skin neat and reduces snagging at the cuticle line (a common cause of accidental lifting). If you want something handbag-friendly, our Vanilla Cuticle Oil Pen is a customer favourite for quick top-ups.
Velvora gel nail strips are designed to deliver salon-quality nails at home with a simpler routine — without compromising on safety or compliance.
If you’re new, starting with the right tools makes everything easier. Our Velvora Gel Nail Strips Starter Kit is built for beginners and includes the essentials to get a clean cure and finish.
For ingredient and compliance details, you can also review our product safety and ingredients information.
Edge lifting is usually caused by choosing a strip that’s slightly too wide (touching skin), applying too close to the cuticle, or leaving oil/moisture on the nail plate. Pick a slightly smaller size, leave a tiny gap around the cuticle, press sidewalls firmly, and cure fully under a UV/LED lamp.
Yes. Under-cured semi-cured gel stays slightly flexible, so it can crease and crack as your nails bend. Make sure your nails sit fully under the lamp, follow the recommended cure time, and add a short extra cure if your nails are thicker or very flexible.
Absolutely — if it’s used before application. Oils prevent proper adhesion, which leads to lifting and then cracking. Apply cuticle oil only after your strips are fully cured, then use it daily to keep skin and nails in good condition.
With good prep, correct sizing, and a proper UV/LED cure, gel nail strips can last up to 2 weeks for many people. Wear time varies with lifestyle (cleaning, hair washing, typing, and how flexible your natural nails are).
Hair washing combines warm water (which makes nails expand) and a lot of friction at the tips and sidewalls. If there’s any tiny lift, water gets underneath and the strip flexes, leading to cracks. Focus on sealing the tip, curing fully, and avoiding overly hot water in the first 24 hours.
When made and sold compliantly, they’re considered cosmetic products and should follow UK/EU safety expectations. Velvora products are vegan, cruelty-free, HEMA-Free, 14-Free, pregnancy safe, and UK/EU compliant (including CPNP registration and REACH-aligned standards). If you have allergies or sensitive skin, patch test where appropriate and stop use if irritation occurs.
Want a set that stays smooth and glossy past day three? Browse the full range of glitter gel nail strips for extra durability at the tips, or explore the full shop and build your routine. Shop now for your next set.
External resources: For a plain-English overview of cosmetic rules and safety expectations in the UK, see the UK Government guidance on cosmetic products. For general nail health tips (including when to seek advice), the NHS guide to nail problems is helpful.

No account yet?
Create an Account
